Handing your deck to someone else can feel like a leap, especially if you have never hired anyone for the job. What will they actually do? How long will it take? What should you ask before you say yes? Knowing the process ahead of time makes the whole experience smoother and helps you spot a good contractor from a mediocre one.
This guide walks through what typically happens, what affects the results, and which questions are worth asking before work begins.
Why Many Homeowners Choose Professional Deck Staining Services
Many homeowners look into professional deck staining services because a good stain job depends far more on preparation than on the stain itself. Cleaning, drying and application all have to be done well, and each step takes time, the right equipment and a good read on the condition of the wood.
The main reasons people hire out are fairly practical. A deck can be large, and staining it properly takes more than a single afternoon. Professionals have the tools to clean and prep surfaces efficiently, and they work with stains regularly, so they know how the product behaves on different woods and in different conditions. The result is usually more even coverage and fewer surprises, such as lap marks, missed spots and drips.
Hiring a pro also takes a project off your weekend list. For many people, that alone is worth it.
The Typical Staining Process, Step by Step
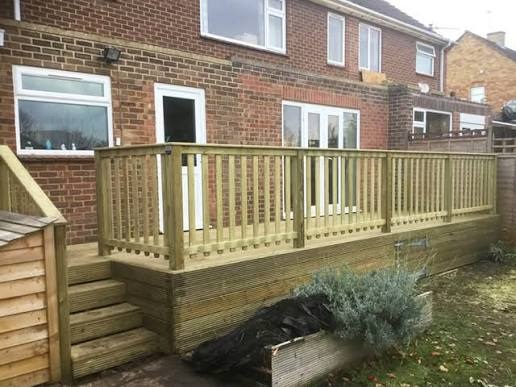
Every contractor has their own methods, but the general process for a deck follows a familiar order.
- Inspection. The deck is checked for loose boards, protruding fasteners, rot and other problems. Anything that needs repair should be addressed before staining.
- Cleaning. Dirt, mildew, algae and old, failing finish are removed. The method depends on the wood and the condition of the surface.
- Repairs and prep. Loose boards are secured, popped nails or screws are fixed, and rough spots are smoothed.
- Sanding where needed. Rough or splintery areas, handrails and stair edges may be sanded so the finish goes on evenly and feels good to the touch.
- Drying. The wood has to dry fully before staining. Rushing this step is one of the most common reasons finishes fail early.
- Stain application. The stain is applied with the right tools and worked into the wood evenly, following the manufacturer’s directions.
- Curing. The deck needs time before it can take normal traffic and furniture again. The exact timing depends on the product and the weather.
This is a general outline of how the industry approaches the job. Ask any contractor you are considering to describe their own steps so you know exactly what is included.
What Affects Timing and Results
No two decks are the same, so timelines and results can vary. Several factors make the biggest difference.
- Weather: Staining needs dry conditions and temperatures within the product’s recommended range. Rain or high humidity can delay the work.
- Moisture in the wood: Wet boards will not absorb stain properly, and product labels set their own limits. One manufacturer’s deck prep guide, for example, calls for 48 hours of drying or a moisture reading of 18 percent or less before restaining, and other products differ, so it pays to ask your contractor what they go by.
- Age and condition: A newer deck needs less prep than an older one with a failing finish or deep weathering.
- Type of stain: Different products have different drying times, coverage and upkeep needs.
- Size and layout: Stairs, railings and spindles take longer than flat boards.
A good contractor will explain how these factors apply to your deck and tell you up front if weather could shift the schedule.
Choosing a Stain: Transparent, Semi-Transparent or Solid
The type of stain you choose changes both the look and the way the deck ages. Here is a simple comparison.
| Stain type | Look | Grain visibility | Best for |
| Transparent | Light tint, natural wood look | Highest | Newer wood in good condition |
| Semi-transparent | Richer color, wood still shows through | Moderate | Most decks, a balance of color and grain |
| Solid | Opaque, paint-like color | Lowest | Older or uneven wood where you want a uniform look |
Generally, the more pigment a stain contains, the more protection it offers against sun, and the less of the natural grain you will see. If you are not sure which fits your deck, ask your contractor to show you samples on a small section of wood.
Questions to Ask Before You Hire
A short conversation before work begins can save you headaches later. Consider asking:
- What steps are included in prep, and how will the deck be cleaned?
- Which type of stain do you recommend for my deck, and why?
- How do you handle bad weather or wet wood on the scheduled day?
- Will you repair or flag loose boards and fasteners before staining?
- How do you protect nearby plants, siding and other surfaces?
- What cleanup is included once the work is finished?
- What care should I follow after the deck is stained?
Clear, direct answers are a good sign. If a contractor skips over prep or cannot explain their process, keep looking.
Caring for the Deck After Staining
Once the deck is done, give it the time it needs. Follow the guidance on how long to keep foot traffic off and when to put furniture back. Using mats under planters and grills helps prevent moisture from getting trapped against the new finish.
Over the following months, sweep regularly and wash gently when dirt builds up. Do a quick water-bead test once a year. If water starts soaking in rather than beading, the finish is starting to wear and it is time to plan for maintenance.
Know What to Expect, and Ask Good Questions
Hiring someone to stain your deck does not have to be stressful. Understand the steps, know what affects the results, and ask the right questions up front. With a clear picture of the process, you can choose a contractor with confidence and enjoy a deck that looks good and holds up through the seasons.